Off-Grid Solar Wiring: Safe Setup in 5 Steps
Wiring an off-grid solar system wrong doesn’t just kill efficiency — it can fry expensive components or start a fire. The problem is that most wiring diagrams floating around online are either oversimplified to the point of being dangerous, or so cluttered with edge cases that beginners can’t extract the core logic. We’ve broken down the actual wiring paths for the most common off-grid solar configurations, component by component, so you can wire your system correctly the first time.
What You’ll Learn
- The standard wiring sequence from panels to battery bank to loads — and why order matters
- Series vs. parallel panel wiring and how each affects your voltage, amperage, and wire sizing
- Correct wire gauge selection based on real amperage and distance calculations
- Where to place fuses, breakers, and disconnects to protect every segment of your system
The Core Wiring Path: How an Off-Grid Solar System Connects
Every off-grid solar system follows the same fundamental wiring sequence, regardless of size:
Solar Panels → Charge Controller → Battery Bank → Inverter → AC Load Panel
That’s it. Every wire in your system exists somewhere along this chain. The complexity comes from doing each connection correctly — right gauge wire, right fuse, right polarity, right torque on terminals.
Component-by-Component Breakdown
Off-Grid Insider
Get off-grid guides & gear picks in your inbox — free
1. Solar panels generate DC power (typically 18–48V depending on panel configuration).
2. The charge controller regulates voltage and current flowing into your batteries. It prevents overcharging and optimizes energy harvest.
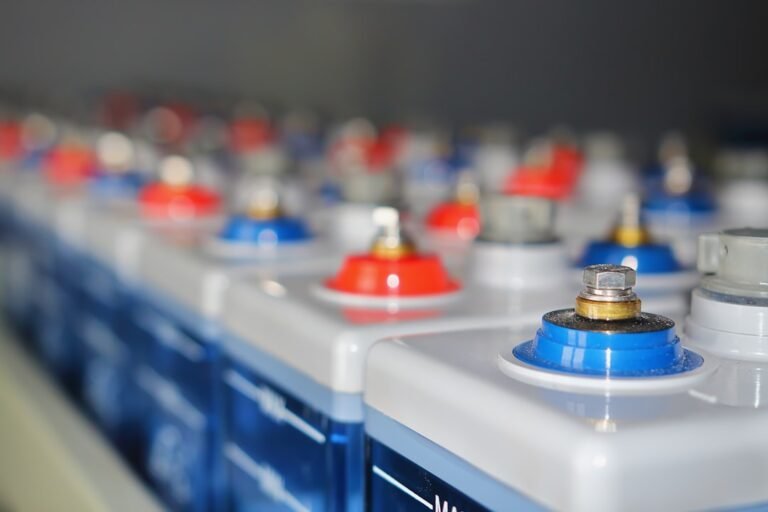
3. The battery bank stores DC energy. 12V, 24V, or 48V nominal depending on your system design.
4. The inverter converts stored DC power to 120V or 240V AC for household loads.
5. The AC load panel (breaker box) distributes power to circuits in your cabin or home.
Each connection between these components needs its own properly sized wire, fuse or breaker, and in most cases a disconnect switch.
Series vs. Parallel: Panel Wiring Configurations
This is where most beginners either get confused or make costly mistakes.
Series Wiring
You connect the positive terminal of one panel to the negative terminal of the next. The result:
- Voltage adds up. Four 40V panels in series = 160V string voltage.
- Amperage stays the same. If each panel produces 10A, the string still produces 10A.
- Wire gauge can be smaller because you’re carrying less current at higher voltage.
Series wiring is the standard choice for MPPT charge controllers like the Victron SmartSolar 100/50 or EPEver Tracer 40A MPPT. MPPT controllers are designed to step down high-voltage input to your battery voltage efficiently.
Critical rule: Your total string voltage must not exceed your charge controller’s maximum input voltage. A Victron 150/35, for example, maxes out at 150V — exceeding this will permanently damage the unit.
Parallel Wiring

You connect all positives together and all negatives together using branch connectors or a combiner box.
- Voltage stays the same. Four 40V panels in parallel = 40V.
- Amperage adds up. Four panels at 10A each = 40A total.
- Requires heavier wire gauge to handle the higher current.
Parallel wiring is typically used with PWM charge controllers on small 12V systems, or when you need to keep voltage low for a specific controller input range.
Series-Parallel (Hybrid)
For larger systems — say six or more panels — you’ll often wire panels in series strings, then connect those strings in parallel. Example: two strings of three 40V/10A panels each gives you 120V at 20A. This balances voltage and current for optimal wire sizing and charge controller compatibility.
Wire Gauge Selection: The Math That Matters
Undersized wire is the single most common and most dangerous wiring mistake in DIY solar. Wire that’s too thin for the current it carries will overheat, melt insulation, and potentially cause a fire.
How to Size Your Wire
You need three numbers:
- Maximum current (amps) the wire will carry
- One-way distance from source to destination (in feet)
- Acceptable voltage drop — keep it under 3% for most runs, under 2% for long runs
Real-World Wire Gauge Reference

For a 12V system with 3% max voltage drop:
| Current | 10 ft run | 20 ft run | 30 ft run |
|---|---|---|---|
| 20A | 10 AWG | 8 AWG | 6 AWG |
| 30A | 8 AWG | 6 AWG | 4 AWG |
| 50A | 6 AWG | 4 AWG | 2 AWG |
For a 48V system, you can generally use wire two to four gauges thinner for the same wattage, because you’re carrying one-quarter the current.
This is why 24V and 48V systems save money on wire. A 3,000W load on a 12V system pulls 250A — requiring massive (and expensive) cable. That same load at 48V pulls only 62.5A.
Battery-to-Inverter Wiring

This is the highest-current connection in your entire system. For a 3,000W inverter on a 12V bank, peak draw can exceed 300A at startup. Use 2/0 AWG or larger copper cable for runs under 6 feet, and always keep this distance as short as physically possible.
We recommend 2/0 AWG battery cables with pre-crimped lugs — DIY crimping at this gauge requires a hydraulic crimper and careful technique. Bad crimps cause resistance, heat, and failures.
Fuses, Breakers, and Disconnects: Where They Go
Every segment of your wiring path needs overcurrent protection. Here’s the placement map:
Between Panels and Charge Controller
- Fuse or breaker on the positive line, rated for the maximum short-circuit current (Isc) of your panel array plus a 25% safety margin.
- A DC-rated disconnect switch here lets you safely isolate panels for maintenance.
Between Charge Controller and Battery Bank

- Fuse or breaker rated for the charge controller’s maximum output current. A 60A charge controller gets an 80A fuse (again, 25% margin per NEC Article 690).
- Use DC-rated breakers only — standard AC breakers cannot safely interrupt DC arcs.
Between Battery Bank and Inverter

- Class T fuse or ANL fuse rated for the inverter’s maximum continuous draw plus 25%. For a 3,000W/12V inverter, that’s roughly 312A continuous — use a 400A Class T fuse.
- Blue Sea Systems 5502 Class T fuse block is the go-to here. Compact, reliable, and properly rated for DC solar systems.
On the AC Output Side
- Standard AC breaker panel after the inverter, wired just like a grid-tied sub-panel. Follow standard residential electrical code for circuit sizing.
Grounding: Don’t Skip This

Every metal component frame — panels, charge controller housing, inverter case, battery rack — must be bonded to a common ground bus, which connects to a ground rod driven at least 8 feet into the earth. Use 6 AWG bare copper for equipment grounding conductors.
The negative battery terminal should bond to ground at one point only (typically at the inverter or charge controller, depending on manufacturer instructions). Multiple ground bonds create ground loops that cause erratic system behavior.
Common Mistakes
1. Using automotive wire for solar runs. Automotive primary wire (GPT) is rated for lower temperatures and isn’t UV-resistant. Use PV wire (USE-2 or PV-rated) for any outdoor panel wiring and THHN/THWN for interior conduit runs.
2. Mixing battery types or ages. Wiring a new lithium battery in parallel with an old AGM bank creates dangerous imbalances. Every battery in your bank should be the same chemistry, brand, capacity, and ideally the same production batch.
3. Oversizing panels without checking charge controller limits. Adding “just two more panels” to a series string can push voltage past your controller’s maximum input — destroying it instantly with no warning and no warranty coverage.
4. Skipping the battery-to-inverter fuse. This is the highest-energy connection in your system. A short here without a fuse can deliver thousands of amps from your battery bank — enough to vaporize wire and ignite surrounding materials in seconds.
Our Recommendations
Best MPPT Charge Controller for Most Systems

Victron SmartSolar 150/35 — handles up to 150V input, 35A output, with Bluetooth monitoring built in. Widely used in the off-grid community, excellent documentation, and compatible with Victron’s ecosystem for system monitoring. Check price on Amazon
Best Budget-Friendly Combiner Box
ECO-WORTHY 4-String Solar Combiner Box — includes fuse holders for four PV strings, pre-wired bus bars, and a weatherproof enclosure. Solid option for systems under 2,000W. Check price on Amazon
Best Inverter for Cabin-Sized Systems

AIMS Power 3000W Pure Sine Wave Inverter — 3,000W continuous with 9,000W surge, built-in transfer switch option, and hard-wire AC output terminals for direct panel connection. Available in 12V, 24V, and 48V input configurations. Check price on Amazon
FAQ
What wire do I run from solar panels to the charge controller?
Use PV wire (USE-2 rated) for outdoor runs. Size it based on your string’s short-circuit current (Isc) multiplied by 1.56 (per NEC), and keep voltage drop under 3%. For a typical 10A string running 30 feet on a 12V system, 10 AWG is minimum — but move to 24V or 48V and you can use thinner, cheaper wire.
Can I use a PWM charge controller instead of MPPT?
You can, but you’ll lose 15–30% of your potential harvest. PWM controllers require panel voltage to closely match battery voltage, which limits your wiring options and panel selection. MPPT controllers cost more upfront but pay for themselves within the first year on most systems through higher energy yield.
How do I wire batteries in series vs. parallel?
Series (positive of one to negative of the next) adds voltage while keeping capacity the same — two 12V/100Ah batteries in series = 24V/100Ah. Parallel (positive to positive, negative to negative) adds capacity while keeping voltage the same — two 12V/100Ah batteries in parallel = 12V/200Ah. For parallel banks, use identical length cables to each battery to ensure even current distribution.
Do I need a permit to wire an off-grid solar system?
This varies by jurisdiction, but many counties require electrical permits for systems above a certain wattage or for any system connected to a structure’s permanent wiring. Even where permits aren’t required, following NEC Article 690 (Solar Photovoltaic Systems) protects you legally and practically. Some insurance companies won’t cover fire damage from unpermitted electrical work.
What’s the minimum system for a small cabin?
For basic lighting, phone charging, and a small 12V fridge: four 100W panels wired in series, a 30A MPPT charge controller, two 100Ah 12V lithium (LiFePO4) batteries in parallel, and a 1,000W pure sine wave inverter. Total wiring is straightforward — you can complete it in a weekend with pre-made cables and a basic combiner setup. Budget roughly $1,500–$2,200 for components depending on battery brand.