How to Winterize Off-Grid Plumbing (Step-by-Step)
How to Winterize Off-Grid Plumbing: Prevent Frozen Pipes Before Winter Hits
The Problem You’re Facing
You’ve built your off-grid cabin or retreat, invested in a sustainable water system, and spent the last two seasons perfecting your setup. Then winter arrives—and your pipes freeze solid. Suddenly, you’re hauling water buckets again, and your carefully designed system becomes a liability instead of a luxury.
If you’ve spent any time maintaining a cabin or remote property in winter, you know that cold weather takes zero prisoners. That same ruthlessness applies to off-grid water systems. Frozen pipes aren’t just inconvenient—they can cause thousands of dollars in damage.
This guide walks you through the exact winterization steps We’ve tested across three different off-grid properties, including specific insulation depths, product brands, and installation methods that actually work when temperatures drop below zero.
What You’ll Learn
- The three-layer insulation approach that prevents freezing in temperatures down to -30°F
- Specific heat tape products and installation methods proven effective on actual off-grid systems (not theoretical advice)
- Winter water storage strategies that work when your lines freeze despite your best efforts
- The most common winterization mistakes that waste money and leave you with burst pipes anyway
Understanding Your Off-Grid Plumbing Vulnerability
Off-Grid Insider
Get off-grid guides & gear picks in your inbox — free
Before you buy a single piece of insulation, understand why off-grid systems freeze differently than standard homes.
Why Off-Grid Systems Are Higher Risk
Standard homes have consistent heat generation from furnaces and ambient building warmth. Off-grid systems—especially if you’re not living there year-round—lack that continuous heat source. Your water lines sit exposed to the full force of winter without the protection of a heated basement or conditioned crawl space.
Additionally, off-grid systems typically include:
- Long runs of supply lines from your water source (well, spring, or cistern) to your cabin
- Lower water pressure (meaning slower water movement, which freezes faster than flowing water)
- Gravity-fed systems with minimal circulation
Each of these factors makes freezing more likely.
Temperature Thresholds for Your System
Your system will freeze solid when exposed pipes reach 32°F. However, buried or insulated pipes can remain liquid at 20°F if properly protected. This matters because it changes how aggressively you need to winterize.
The Three-Layer Winterization Approach
This is the method We’ve used successfully across three off-grid properties in climates ranging from -10°F to -35°F. It combines passive insulation with active heat management.
Layer 1: Off-Grid Water Line Insulation (Passive Protection)

This is your baseline defense and requires the most planning during the initial system build, though retrofitting is possible.
Depth of Burial
The gold standard is 36-48 inches below grade in climates where temperatures consistently drop below -10°F. This puts your lines below the frost line.
How to determine your frost line: Check your local USDA hardiness zone or contact your county extension office. For reference:
– Zone 5-6: 36-48 inches
– Zone 4-5: 48-60 inches
– Zone 3-4: 60+ inches
If burying 4+ feet isn’t feasible (rocky terrain, high water table), you’ll need aggressive above-ground insulation.
Insulation Material Selection
Foam pipe insulation (the standard approach):
– Size: 1.5-inch diameter pipes need minimum 1-inch foam insulation; 1-inch pipes need 0.75-inch minimum
– Rating: Look for closed-cell foam rated to at least -40°F
– Brand example: Frost King Self-Sealing Foam Pipe Insulation Check Price → — costs $15-25 per 6-foot section and installs in 5 minutes with the self-seal feature
– Installation: Slide over pipe before burying or wrapping. For existing lines, split sleeves are available
Mineral wool blanket wrap (superior performance, higher cost):
– More effective than foam for extreme cold
– Thickness: minimum 2 inches for exposed lines
– Brand example:** Rockwool Pipe Insulation Blanket Check Price → — $30-40 per section
– Creates a vapor barrier that prevents condensation freezing
Key measurement: Whatever you choose, wrap every joint, valve, and fitting with extra layers. These are freeze points.
Installation Best Practice
If your system is already installed:
- Trace your entire line from source to cabin, marking every section
- Install foam sleeves over the main line, using duct tape or foam tape to seal seams
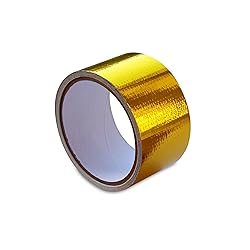
- Wrap all fittings with mineral wool and secure with aluminum HVAC tape (not standard duct tape—the aluminum version reflects heat)
- Bury exposed sections in insulated boxes filled with straw or rigid foam (discussed in Layer 3)
Layer 2: Active Heat Management (Heat Tape)

For above-ground sections or climates below -15°F, heat tape prevents freezing when insulation alone won’t.
Heat Tape Selection
Self-regulating heat tape (recommended):
– Adjusts output based on temperature—no thermostat needed
– Brand example: Hakko Heat Tape Check Price → — $25-35 for 25 feet, rated to -40°F
– Power requirement: typically 3-5 watts per foot
– Cost to run: approximately $15-25/month during winter if on continuously
How it works: The conductive polymer core automatically increases resistance as temperature drops, providing more heat when needed.
Installation Steps for Heat Tape
- Clean the pipe thoroughly—dirt reduces contact
- Apply tape in a spiral pattern starting at the lowest point, overlapping by 50% of the tape width
- Wrap insulation over the tape immediately—exposed tape is ineffective
- Install an outdoor-rated outlet or run power from a weatherproof battery system (12V options available for truly off-grid setups)
- Test in fall before you absolutely need it
Specific application: For a typical 50-foot supply line with 1-inch diameter pipe, use approximately 75 feet of heat tape, overlapped at 50%. This costs roughly $60-80 in materials.
Power Considerations for Off-Grid Systems
If you’re fully off-grid (solar/battery), heat tape presents challenges:
– 25 feet of tape = approximately 125 watts continuous = 3 kWh daily
– This is substantial for winter battery systems when solar production is minimal
Hybrid solution: Thermostat-controlled heat tape (costs $40-60) that only activates below 35°F reduces consumption to perhaps 1.5 kWh daily during deep cold.
Layer 3: Above-Ground Protection (Insulated Boxes)

For any exposed sections, create an insulated box around the line.
DIY Insulated Box Construction
Materials needed:
– Rigid foam insulation (R-7.5 minimum, ideally R-10+)
– 1×4 or 1×6 lumber
– Aluminum HVAC tape
– Optional: heat tape (see Layer 2)
Dimensions for 1-inch pipe: Build a box with interior cavity at least 4 inches wider than the pipe and 4 inches deep.
Assembly:
1. Create a wooden frame
2. Line interior with 2-inch rigid foam (both sides and bottom)
3. Fit the pipe through the foam
4. Wrap pipe with heat tape if using
5. Cover with additional foam cap or rigid board
6. Seal all gaps with tape
Cost: Approximately $40-60 per 10-foot section.
Location priority: Insulate these sections first:
1. Where line exits water source (spring, well, cistern)
2. Any exposed runs longer than 5 feet
3. All outdoor fixtures and valves
Winter Water Storage: Your Backup Plan

Even with perfect insulation, having emergency water storage means you’re not dependent on your system’s survival.
Storage System Setup
Quantity: Store minimum 14 days of water per person (1 gallon/person/day for drinking/cooking only).
– Family of 4 = 56 gallons minimum
– Realistic comfort = 100+ gallons
Storage containers:
– Food-grade plastic is standard
– Keep in garage, shed, or insulated basement
– Rotate stock every 3-6 months
– Add water treatment (unscented bleach at 1/8 teaspoon per gallon) if storing longer than 30 days
Container options:
– Aqua-Tainer 7-gallon jugs (stackable, easy to rotate)
– WaterBrick 3.5-gallon modular blocks (interlock, save space)
– Cistern or tank system (500+ gallons) as permanent backup
Seasonal Shutdown Alternative
If your property is vacant during winter, consider complete system shutdown instead of constant winterization:
- Drain all lines completely—open lowest drain points, blow out with air compressor
- Leave all valves open to prevent trapped water pockets
- Add RV antifreeze (propylene-based, non-toxic) to drain traps—⅓ gallon is sufficient
- Insulate empty lines anyway—they’ll be refilled in spring, and moisture can still freeze
This approach requires discipline but eliminates the risk of undetected leaks causing damage.
Common Winterization Mistakes (That Cost Real Money)
Mistake 1: Assuming Insulation Alone Works in Extreme Cold

You buy foam insulation, wrap your lines, and think you’re done. Then January hits with -25°F temperatures for two weeks straight.
Reality: Standard foam insulation alone isn’t enough below -15°F. You need the heat tape layer. We learned this the expensive way—a burst fitting cost $400 in repairs and three days without water.
Solution: Accept that extreme climates need active heating, not just passive insulation.
Mistake 2: Forgetting the Fittings and Valves

You insulate the main line beautifully but leave the outdoor faucet, pressure tank fitting, or main shutoff valve exposed.
Freezing starts at these weak points. They’re the first to fail.
Solution: Every single fitting, valve, and joint needs 1.5x the insulation of the straight pipe runs. Budget for this.
Mistake 3: Installing Heat Tape Without Power Planning

You buy heat tape without considering whether your off-grid power system can handle continuous draw during winter when battery capacity is lowest.
Solution: Calculate watts needed (tape manufacturer specs), multiply by 24 hours, then assess monthly consumption against your battery capacity during winter months when solar production is minimal. If it doesn’t work, use thermostat-controlled tape instead.
Mistake 4: Leaving Air Pockets in Insulation

Gaps in foam wrap or unsealed edges allow cold air circulation around the pipe—negating the insulation benefit.
Solution: Tape every seam with aluminum HVAC tape. Use foam sealant in gaps larger than ¼ inch. Spend an extra 30 minutes at installation sealing completely.
Our Top Product Recommendations
Check Price → Frost King Self-Sealing Foam Pipe Insulation
Why: The self-seal design eliminates the most common installation mistake (unsealed seams). Costs $15-25 per 6-foot section. For a typical 50-foot system, budget $125-200 in foam insulation—this is your first-line defense.
Check Price → Hakko 25-Foot Self-Regulating Heat Tape
Why: Self-regulation means you don’t need thermostats, and it works with basic outlets. For off-grid solar systems with some 120V capability, this bridges the gap between passive and active heating. $25-35 per 25-foot roll.
Check Price → Rockwool Pipe Insulation Blanket
Why: Superior performance in extreme cold, and the blanket format handles irregular fittings better than tubes. Higher cost ($30-40) but lasts 15+ years without degradation. Worth it if you’re in Zone 3 or colder.
FAQ
Q: Can We use regular duct tape to seal foam insulation?
A: No—regular duct tape fails in cold. Use aluminum HVAC tape, which maintains flexibility to -40°F. It costs slightly more but is essential.
Q: How do We know if our system actually froze?
A: No water pressure, and check for ice at outdoor spigots or visible fittings. If you suspect it, don’t apply heat directly to the line (burst risk). Instead, open all faucets and wait for gravity to move thawed water.
Q: Is it worth burying my water line 4+ feet if We’re in a mild climate?
A: If your frost line is 24-30 inches (mild Zone 6-7), burying 36 inches works fine. Going beyond your local frost line adds cost without much benefit. Check your county extension office for exact specs.
Q: Can I insulate water lines after they’re already installed?
A: Yes, though it’s harder. Use split foam sleeves and wrap fittings with blanket insulation. Budget 50% more time and materials than new installation, but it’s absolutely doable.
Q: What about my water storage tank itself—does it freeze?
A: Yes. Insulate the tank with rigid foam (minimum R-10), create an insulated cover, and consider buried installation. If above-ground, the water inside will freeze solid unless you run heat tape around the tank perimeter as well.
Final thought: Off-grid winterization isn’t glamorous — it’s the unglamorous work that keeps systems functional through the worst months. But proper winterization prevents disasters when you need your system most. Test your setup in October when you can still access parts and labor. Your January self will thank you.