Heat Your Greenhouse All Winter Without Power
Keeping a greenhouse warm through winter without a single watt of grid power sounds like a contradiction — until you understand the physics. Thermal mass, passive solar design, composting heat, and simple combustion strategies have kept growers producing food in sub-zero climates for centuries. The trick isn’t finding one magic solution; it’s stacking multiple methods so your greenhouse stays above freezing even on the coldest nights.
We dug into the data on each method — actual BTU output, material costs, and what experienced off-grid growers report working (and failing) in practice. Here’s what you need to know.
What You’ll Learn
- How thermal mass works and exactly how much water or stone you need per square foot of growing space
- Compost heating systems that generate 100°F+ core temperatures for weeks
- Rocket mass heaters and other combustion options that burn a fraction of the wood a traditional stove uses
- How to layer these methods so your greenhouse stays above 35°F even when it’s -10°F outside
Thermal Mass: Your First Line of Defense
Thermal mass is the simplest, most reliable way to buffer greenhouse temperatures without electricity. Dense materials — water, stone, concrete, earth — absorb heat during the day and radiate it back at night.
Water Barrels
Off-Grid Insider
Get off-grid guides & gear picks in your inbox — free
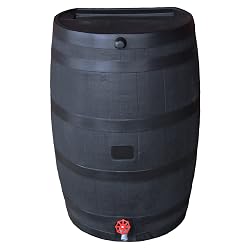
Water stores roughly 62 BTUs per cubic foot per degree Fahrenheit, making it one of the most efficient thermal mass materials available. The standard approach is lining your greenhouse’s north wall with 55-gallon drums filled with water and painted flat black.
How much do you need? A common rule of thumb from solar greenhouse designers is 2 to 2.5 gallons of water per square foot of glazing area. For a 10×20-foot greenhouse with about 300 square feet of south-facing glazing, that means 600–750 gallons — roughly twelve to fourteen 55-gallon drums.
Paint them flat black with high-heat spray paint. Position them where they catch direct sunlight during the day. At night, they’ll radiate that stored heat back into the greenhouse, typically keeping temperatures 15–25°F above outside lows depending on insulation quality.
You can find 55-gallon drums on Amazon for around $60–$90 each new, though local food-grade barrel resellers are often cheaper.
Stone and Concrete
Crushed gravel beds, concrete block walls, or flagstone floors also store heat, though less efficiently than water per pound. Stone stores roughly 20 BTUs per cubic foot per degree — about a third of water’s capacity. The advantage is durability and the ability to integrate it structurally. A 4-inch gravel floor under raised beds adds meaningful thermal mass while improving drainage.
Compost Heating: Free BTUs from Decomposition
A well-built compost pile generates core temperatures of 110–160°F and sustains them for 4–8 weeks. Off-grid growers have been running hot water lines through compost piles to heat greenhouse floors and beds since at least the 1970s, and the method is well-documented.
The Jean Pain Method
The classic approach uses a large mound of woodchip-based compost (roughly 50–80 cubic yards for serious heating) with coiled polyethylene tubing running through the core. Water circulates by thermosiphon — no pump, no electricity — rising as it heats and flowing into the greenhouse where it warms raised beds or a radiant floor.
For a smaller greenhouse, a more practical setup is a 4×4×4-foot insulated compost bin adjacent to or inside the greenhouse. At that volume, you won’t heat a large space, but you can keep a propagation bench or seedling area warm.
Key specs for effective compost heat:
- Carbon-to-nitrogen ratio of 25:1 to 30:1 (mix woodchips with fresh manure or green waste)
- Moisture content around 50–60% — it should feel like a wrung-out sponge
- Minimum volume of 3×3×3 feet for sustained thermophilic temperatures
- Use 1/2-inch or 3/4-inch polyethylene tubing rated for hot water — at least 100 feet of coil per cubic yard of compost
Polyethylene tubing for compost heating runs $30–$50 per 100-foot roll.
Hot Bed Method
Simpler still: build a raised bed directly on top of 18–24 inches of fresh horse manure mixed with straw, then cap it with 6–8 inches of soil. The decomposing manure heats the root zone from below. This is a centuries-old technique that still works. Expect bottom heat of 70–85°F for 6–8 weeks — ideal for starting spring transplants in February or March.
Rocket Mass Heaters: Maximum Heat, Minimum Wood
If you need active heating on the coldest nights, a rocket mass heater (RMH) is the most fuel-efficient non-electric option. A properly built RMH burns wood at 1,000°F+ in a small, insulated combustion chamber, then routes exhaust through a massive thermal mass bench or floor before exiting the chimney.
The result: an RMH uses roughly one-fifth to one-tenth the wood of a conventional wood stove while heating the thermal mass for 12–24 hours after a single 1–2 hour burn.
What You Need
- A J-tube or batch-box combustion core (6-inch or 8-inch system for most greenhouses)
- Insulated riser — typically ceramic fiber blanket or perlite-filled
- 30–50 feet of metal flue pipe routed through a cob or masonry mass bench
- A proper chimney exit with clearance from combustible materials
Building an RMH is a serious DIY project. Expect $200–$500 in materials if you source steel drums, firebrick, and pipe locally. For prefab components, rocket stove cores on Amazon can serve as a starting point, though most greenhouse RMH builders fabricate their own from firebrick and steel.
Important: Check local building codes. Rocket mass heaters exist in a regulatory gray area in many jurisdictions. Some counties require a permit or an engineer’s stamp.
Passive Solar Design Upgrades

If you’re building or retrofitting a greenhouse, these design changes multiply the effectiveness of every other method on this list.
Insulate the North Wall
A greenhouse that’s glazed on all four sides loses enormous amounts of heat through the north face, which receives almost no direct winter sun at mid-latitudes. Replacing north-side glazing with an insulated wall (R-15 or higher) and painting the interior white or covering it with reflective Mylar bounces light back onto plants while cutting heat loss dramatically.
Double-Layer Glazing
Two layers of polyethylene film with a dead air space between them (inflated with a small hand bellows if you want zero electricity) increase insulation from roughly R-0.9 to R-1.5. That 60%+ improvement in insulation is significant over an entire winter. Greenhouse poly film in 6-mil thickness runs about $80–$150 for a 20×50-foot roll.
Thermal Curtains

Hanging an insulating curtain — heavy row cover, bubble wrap, or purpose-built greenhouse thermal blankets — over the glazing at night adds another R-1 to R-3 depending on material. Pull them at sunrise, drop them at sunset.
Common Mistakes
Relying on a single method. No one technique is enough in truly cold climates. Thermal mass alone won’t save you at -20°F. Stack water barrels plus compost heat plus a rocket mass heater for redundancy.
Undersizing thermal mass. Five-gallon buckets scattered around the greenhouse look like they’re doing something, but the math doesn’t lie. You need hundreds of gallons to meaningfully shift overnight temperatures. Do the calculation: 2–2.5 gallons of water per square foot of glazing.
Ignoring air leaks. All the thermal mass in the world won’t help if your greenhouse hemorrhages warm air through gaps in the glazing, door seals, or foundation. Seal every joint with greenhouse repair tape and weatherstripping before investing in heating.
Building compost piles too small. A 3×3×3-foot pile is the minimum for thermophilic composting. Anything smaller won’t generate or sustain useful heat. For actual greenhouse heating through tubing, you need significantly more volume.
Our Recommendations
Best Thermal Mass Setup: 55-Gallon Water Barrels
55-Gallon Water Storage Drums — Twelve to fourteen barrels along the north wall of a 200-square-foot greenhouse provide the foundation of any passive heating system. Look for food-grade HDPE drums with removable bung caps. Paint flat black with Rust-Oleum high-heat spray. Budget roughly $800–$1,100 for the full setup including paint and pallets.
Best Active Heating: DIY Rocket Mass Heater with Firebrick Core
For nights when passive methods aren’t enough, a 6-inch J-tube rocket mass heater with a cob bench running the length of your greenhouse provides 12+ hours of radiant heat from a single burn session. Source firebrick and build the core yourself — total materials cost runs $200–$500. This is the most labor-intensive option but delivers the best BTU-per-dollar return over time.
Best Root Zone Heating: Compost Hot Bed

No purchases required beyond a manure source. Layer 18–24 inches of fresh horse manure and straw, top with soil, and plant directly. For a more sophisticated setup, run 1/2-inch poly tubing through a dedicated compost bin and route warm water to under-bed loops via thermosiphon. Cost: under $100 in tubing and fittings if you have access to free compost materials.
FAQ
How warm can a greenhouse stay without electricity?
With stacked methods — insulated north wall, double-layer glazing, adequate water thermal mass, and a rocket mass heater for the coldest nights — off-grid growers in USDA zones 4 and 5 routinely keep greenhouses above 35–40°F when outside temps drop to -10°F. In milder climates (zones 6–7), thermal mass and passive solar alone can maintain above-freezing temperatures most nights.
Can I heat a greenhouse with candles or propane heaters?
Candles produce roughly 80 BTUs per hour — you’d need dozens to meaningfully heat even a small greenhouse, and the fire risk is significant. Propane heaters work but produce moisture and CO2 that must be vented. A single 20-lb propane tank produces about 430,000 BTUs total, which might last 2–4 days of moderate heating in a small greenhouse. It’s a viable backup but not a sustainable primary strategy.
How long does compost heating last?
A properly built thermophilic compost pile sustains core temperatures above 100°F for 4–8 weeks. After that, it needs to be rebuilt or supplemented with fresh material. Plan for rebuilding the pile 2–3 times per winter season if compost is your primary heat source.
Does burying a greenhouse (walipini style) help?
Yes, significantly. Below the frost line — typically 3–4 feet in northern climates — soil temperature holds steady at 45–55°F year-round. A sunken or earth-sheltered greenhouse (walipini) starts with that baseline instead of the ambient air temperature, which can mean a 50–60°F advantage on the coldest nights. The tradeoff is drainage complexity and higher construction cost.
What’s the cheapest way to start?
Water barrels and an insulated north wall. For under $200, you can add four to six 55-gallon drums of water thermal mass and staple rigid foam insulation to your greenhouse’s north face. That alone shifts overnight low temperatures by 10–20°F in many setups and buys you time to add compost heating or an RMH later.