Build an Off-Grid Pantry That Keeps Food Fresh 12 Months
Growing your own food is only half the battle on a homestead. Without reliable storage, you’ll watch hard-earned harvests rot in weeks. Off-grid food storage isn’t just about stuffing shelves — it demands temperature control without grid power, moisture management, pest prevention, and a system you can actually maintain year-round. Whether you’re building out a dedicated pantry in a cabin, planning a root cellar from scratch, or just trying to keep produce cool without refrigeration, this guide covers the practical steps that separate a functional food storage system from an expensive compost pile.
What You’ll Learn
- How to design and organize a dry pantry for maximum shelf life — including shelving specs, container choices, and airflow
- Step-by-step root cellar construction for consistent cool storage without electricity
- Proven cool-storage methods that work without refrigeration in any climate
- Food preservation techniques suited to off-grid homesteads, from canning to fermentation
Designing Your Off-Grid Dry Pantry

A dedicated pantry room is the backbone of off-grid food storage. The goal is simple: keep food cool, dry, dark, and sealed against pests. Here’s how to build one that actually works.
Location and Layout
Off-Grid Insider
Get off-grid guides & gear picks in your inbox — free
Choose an interior north-facing wall if possible — it stays coolest in summer. Avoid exterior walls with direct sun exposure. A pantry measuring 6×8 feet stores roughly 6–12 months of food for two adults, depending on how much you preserve. If you’re feeding a family of four, aim for 8×10 feet minimum.
Floor-to-ceiling shelving on three walls maximizes space. Leave the fourth wall for the door and a small workstation for labeling and rotating stock.
Shelving That Holds Up
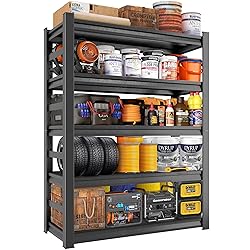
Skip particle board — it absorbs moisture and sags under load. Use 3/4-inch plywood on solid pine or 2×4 brackets, or go with wire shelving for better airflow. Heavy-duty wire shelving rated for 500+ lbs per shelf (like Seville Classics units) handles the weight of canned goods without sagging.
Key measurements:
– Shelf depth: 16–18 inches (deeper shelves hide food and lead to waste)
– Shelf spacing: 10–12 inches for canned goods, 14–16 inches for gallon jars and bulk bags
– Bottom shelf: At least 6 inches off the floor for cleaning access and flood protection
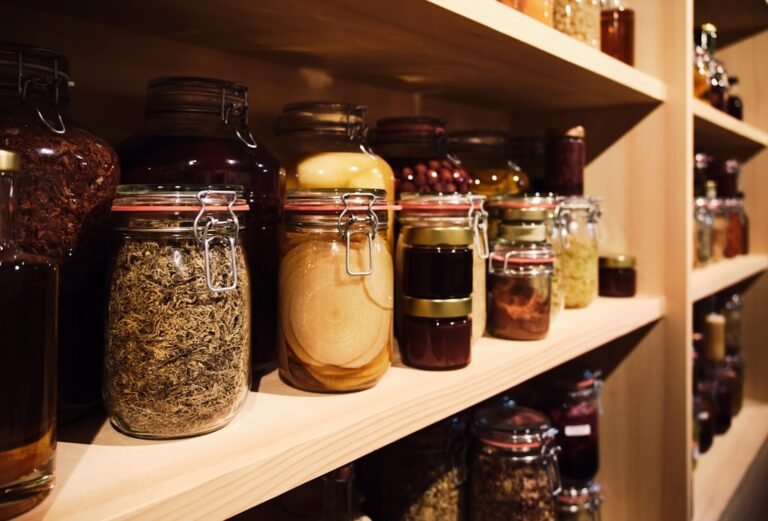
Containers and Organization
Bulk dry goods — flour, rice, beans, oats, sugar — belong in airtight containers, full stop. Oxygen and moisture are the enemies. Gamma-seal lids on food-grade 5-gallon buckets are the gold standard for bulk staples. For smaller quantities, half-gallon glass Mason jars or OXO POP containers keep things visible and accessible.
Label everything with contents and the date stored. Use a FIFO system (first in, first out) — new stock goes to the back, older stock moves forward. This sounds obvious until you find a bucket of flour from two years ago buried behind everything else.
Temperature and Humidity Control
Ideal dry pantry conditions: 50–70°F and below 60% relative humidity. Without HVAC, manage this with:
- Passive ventilation: Install two screened vents — one low, one high — on opposite walls to create natural convection airflow
- Moisture absorbers: Hang DampRid bags or place calcium chloride containers on lower shelves
- A hygrometer: Mount a simple digital hygrometer so you can actually track conditions rather than guessing
Building a Root Cellar for Cool Storage Without Refrigeration

A root cellar is the off-grid refrigerator. Done right, it holds 32–40°F in winter and 50–60°F in summer — cool enough to store root vegetables, apples, eggs, cheese, and fermented foods for months without a single watt of electricity.
Site Selection
You need earth contact and drainage. The ideal spot is a north-facing hillside where you can dig into the slope, giving you earth-covered walls and ceiling with a ground-level entry. If you’re on flat ground, you can dig down 8–10 feet and build an above-grade entrance with steps.
Critical: Check your water table first. Dig a test hole to 8 feet during spring (when the water table is highest). If you hit water at 5 feet, your cellar floor needs to be above that — or you’ll have a well, not a root cellar.
Construction Basics
The simplest proven design uses concrete block walls on a poured concrete footer, with a reinforced concrete ceiling covered by 2–3 feet of earth. Here’s the core structure for a 8×10 foot cellar:
- Footer: 8 inches deep, 16 inches wide, poured concrete with #4 rebar
- Walls: 8-inch concrete block, reinforced with rebar and filled cores every 4 feet. Apply two coats of waterproofing membrane (like Drylok) to the exterior before backfilling
- Ceiling: 6-inch reinforced concrete slab, or pressure-treated beam-and-plank construction rated for earth load
- Floor: 4 inches of compacted gravel topped with paver stones (not concrete — you want moisture to rise through the floor to maintain humidity)
- Drainage: Lay 4-inch perforated drain tile around the exterior footer, sloped to daylight or a dry well
Ventilation — The Part Most People Get Wrong

A root cellar needs two PVC pipes: a 4-inch intake pipe that runs from outside down to 12 inches above the floor, and a 4-inch exhaust pipe at ceiling level on the opposite wall. Cool air falls through the intake; warm, stale air rises and exits through the exhaust. Cap both with screened elbows to keep rodents and rain out.
Without this airflow, ethylene gas from ripening produce accumulates and accelerates spoilage across everything in the cellar.
What Stores and How Long
| Produce | Ideal Temp | Humidity | Expected Storage Life |
|---|---|---|---|
| Potatoes | 38–42°F | 90–95% | 4–6 months |
| Carrots (in damp sand) | 32–40°F | 95% | 4–5 months |
| Apples | 32–40°F | 80–90% | 2–4 months |
| Onions | 32–40°F | 65–70% | 3–5 months |
| Cabbage | 32–40°F | 90–95% | 3–4 months |
| Winter squash | 50–55°F | 50–70% | 3–6 months |
Keep apples away from potatoes and carrots — the ethylene gas apples release causes potatoes to sprout and carrots to bitter.
Food Preservation Techniques for the Off-Grid Homestead

Storage only goes so far. Preservation multiplies your harvest across seasons.
Water Bath and Pressure Canning
Water bath canning handles high-acid foods: tomatoes, pickles, jams, fruit. Pressure canning is mandatory for low-acid foods like green beans, meat, and soups — no exceptions. Botulism is not a theoretical risk; it’s a real one. Use tested recipes from the USDA Complete Guide to Home Canning or the Ball Blue Book.
An All American pressure canner (the 921 model holds 19 quart jars) is the workhorse choice — all-metal construction, no gasket to replace, and it works on wood cookstoves.
Dehydration

Solar dehydrators work well in dry climates. For humid regions or faster results, an Excalibur 9-tray dehydrator runs on about 600 watts — manageable on a modest solar setup. Dehydrated vegetables, fruits, herbs, and jerky store for 6–12 months in vacuum-sealed bags or Mason jars with oxygen absorbers.
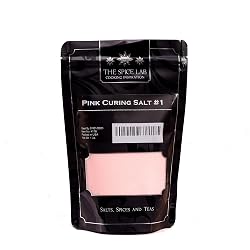
Fermentation and Salt Curing
Fermentation requires no energy at all. Sauerkraut, kimchi, fermented hot sauce, and lacto-fermented pickles store for months in a cool root cellar. Use ceramic crocks or wide-mouth half-gallon jars with fermentation lids that vent CO2 without letting air in.
Salt curing and smoking extend meat storage without refrigeration — this is how people kept pork for centuries before electricity.
Common Mistakes
- No pest barrier: Mice chew through plastic bags overnight. Every dry good needs a hard container — glass, metal, or heavy-duty HDPE buckets. Bay leaves tucked into grain containers help deter weevils.
- Skipping the hygrometer: Humidity above 70% in a dry pantry breeds mold. Below 30% dries out produce in a root cellar. You can’t manage what you don’t measure.
- Building a root cellar without drainage: Even a well-sited cellar floods without perimeter drain tile. Waterproofing the walls is not enough — water needs somewhere to go.
- Storing everything together: Ethylene-producing fruits (apples, pears, tomatoes) accelerate spoilage in nearby vegetables. Separate them or ventilate aggressively.
Our Recommendations
-
Gamma Seal Lids + 5-Gallon Buckets: The most cost-effective bulk storage system. Each bucket holds about 33 lbs of rice or 25 lbs of flour. Gamma lids spin on and off one-handed — a major upgrade over standard snap lids when you’re accessing stock daily.
-
All American 921 Pressure Canner: Heavy, expensive, and worth every dollar. The metal-to-metal seal means no rubber gasket to crack or replace. Holds 19 quart jars per batch and works on any heat source including wood stoves. This is a buy-once tool.
-
Seville Classics 5-Tier Wire Shelving: Adjustable shelf heights, NSF-certified, and rated for 500 lbs per shelf on leveling feet. Wire design prevents moisture trapping that kills wooden shelves in damp pantries. Available in 48-inch and 60-inch widths.
FAQ
How much food storage space do we need per person?
Plan roughly 20–30 square feet of pantry shelving per adult for a 6-month supply. A well-stocked root cellar adds another 40–60 square feet for fresh produce storage. These numbers assume a mix of canned goods, bulk dry staples, and preserved harvest.
Can we build a root cellar in a warm climate?
Yes, but expectations change. In USDA zones 8–10, earth temperatures at 8-foot depth stay around 55–65°F — not cold enough for long-term apple or potato storage, but excellent for canned goods, wine, fermented foods, and short-term vegetable holding. Pair the cellar with a zeer pot (evaporative cooler) for additional cooling in dry climates.
How do we keep a root cellar from getting too humid?
Increase exhaust ventilation on dry days by opening the intake pipe fully. In persistently damp cellars, place a bucket of rock salt or calcium chloride inside — it absorbs significant moisture from the air. Monitor with a hygrometer and aim for 85–95% humidity for root crops, lower (60–70%) for onions and garlic.
What’s the cheapest way to start off-grid food storage?
Start with 5-gallon buckets, Gamma lids, and a set of wide-mouth Mason jars. Add Mylar bags and oxygen absorbers inside the buckets for staples you won’t open for months. Total investment for a 3-month supply of rice, beans, oats, and flour runs about $150–200 in containers and $200–300 in food. Build shelving from reclaimed lumber and you’re functional for under $500.
Do we need to treat wood shelving in a root cellar?
Use naturally rot-resistant species — eastern red cedar, black locust, or white oak. Avoid pressure-treated lumber in any food storage area due to chemical leaching concerns. If using pine, seal with food-safe mineral oil or leave untreated and plan to replace boards every 5–8 years as moisture takes its toll.