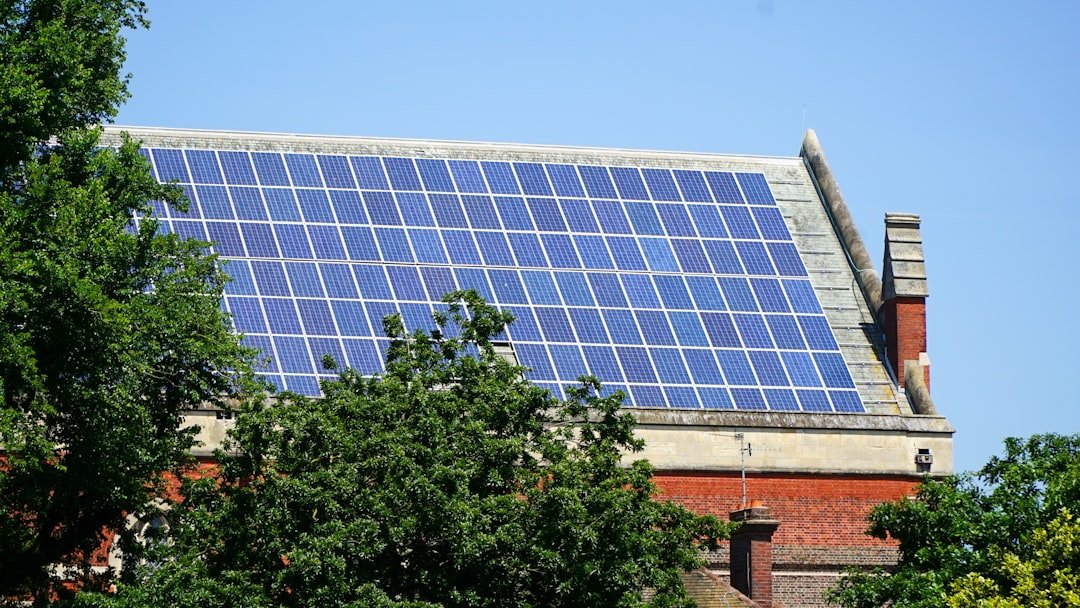
Mount Solar Panels on Metal Roofs (No Leaks)
Metal roofs are one of the best surfaces for solar panels — they’re durable, fire-resistant, and most standing seam profiles let you mount panels without drilling a single hole. But get the mounting method wrong, and you’re looking at leaks, voided warranties, or panels ripping off in a windstorm. We’ve dug into manufacturer specs, building codes, and feedback from installers and off-grid homeowners to put together a clear, step-by-step guide for getting this right the first time.
What You’ll Learn
- How to choose the correct mounting system for your specific metal roof profile (standing seam, corrugated, or R-panel)
- Exact tools, hardware, and torque specs you need for a secure, leak-free install
- How to plan panel layout for maximum production and proper load distribution
- Common mistakes that lead to leaks, wind damage, or voided roof warranties
Identify Your Metal Roof Type First
Before you buy a single clamp, you need to know exactly what roof profile you’re working with. The mounting hardware is completely different for each type, and using the wrong system is the number-one cause of failed DIY solar installs on metal roofs.
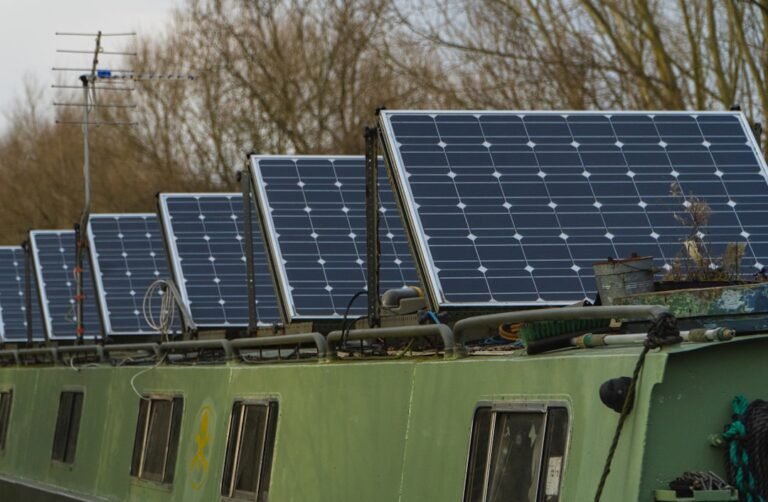
Standing Seam
Off-Grid Insider
Get off-grid guides & gear picks in your inbox — free
Standing seam roofs have raised vertical ribs (typically 1″ to 2″ tall) that run from ridge to eave. The seams are either snap-locked or mechanically seamed. This is the easiest and most secure roof type for solar because you can use non-penetrating S-5! clamps or similar products that grip the seam without any holes.
Corrugated (Wavy Profile)
Corrugated panels have a repeating wave pattern. These require bracket mounts with lag bolts that penetrate through the raised ridges of the corrugation. You’ll need proper flashing and sealant at every penetration point.
R-Panel / PBR Panel (Trapezoidal Ribs)
R-panels have trapezoidal raised ribs, usually about 1.25″ tall. Like corrugated, these require penetrating mounts — but the flat areas between ribs give you more flexibility for bracket placement.
Tools and Materials You’ll Need

Tools:
– Cordless drill/driver with hex and socket adapters
– Torque wrench (critical — do not skip this)
– Chalk line and tape measure
– Speed square
– Stud finder (if attaching to purlins below the roof deck)
– Fall protection harness and roof anchors
Mounting Hardware (Standing Seam):
– S-5! S-5-N clamps or S-5! CorruBracket (for corrugated)
– Mid-clamps and end-clamps sized for your panel frame thickness (typically 30mm, 35mm, or 40mm)
– Aluminum rail — IronRidge XR100 is the industry standard for residential
– Stainless steel bonding hardware (for grounding)
Mounting Hardware (Corrugated / R-Panel):
– S-5! CorruBracket 500T or EcoFasten GeoGrabber
– 5/16″ × 2″ stainless steel lag bolts with EPDM-backed sealing washers
– Butyl tape or manufacturer-approved sealant (not silicone caulk — it degrades on metal roofs)
Step-by-Step: Mounting on a Standing Seam Roof

Step 1 — Plan Your Layout
Measure your roof dimensions and map out panel placement. Key constraints:
- Setback from edges: Most building codes require 18″ minimum setback from the ridge and 12″ from eaves and rakes. Check your local jurisdiction — fire code setbacks (IFC 2018+) may require 3-foot pathways for firefighter access.
- Purlin spacing: If your roof decking is over purlins (common in pole barns and metal buildings), you want your rail attachment points to land over purlins for maximum pullout strength. Purlins are typically spaced 24″ or 48″ on center.
- Panel orientation: Portrait orientation (long side vertical) is standard and uses fewer rails. Landscape works too but requires a third rail for most 60/66-cell panels.
Step 2 — Attach Clamps to the Seam

For S-5! clamps on standing seam, the process is straightforward:
- Slide the clamp over the seam at your marked location.
- Tighten the single set screw with a 7/16″ socket or wrench.
- Torque to the manufacturer’s specification — for the S-5-N mini, that’s 150 in-lbs (12.5 ft-lbs). Over-torquing can deform the seam and compromise the roof.
Space your clamps according to your rail manufacturer’s span table. For IronRidge XR100 rail with standard wind loads, clamp spacing is typically 48″ on center, with end cantilevers no more than 12″ past the last clamp.
Step 3 — Install the Rails

Slide your aluminum rails into the L-foot or top-mount adapter on each clamp. Rails should run horizontally (perpendicular to the standing seams). Use splice bars where you need to join two rail sections — never butt-join without a splice.
Confirm rails are level. Minor adjustments can be made by loosening the clamp bolts and shimming, but if your roof plane is significantly out of plane, you may need adjustable tilt legs.
Step 4 — Set the Panels
Start at one end and place your first panel on the rails. Secure it with end-clamps on the outside edge. Slide the next panel in, leaving a 0.5″ gap between frames for thermal expansion, and secure the joint with a mid-clamp. Repeat across the array. Finish the last panel with end-clamps.
Clamp torque matters. IronRidge specifies 10 ft-lbs (120 in-lbs) for their mid-clamps and end-clamps. Under-torqued clamps are the leading cause of panels dislodging in high winds.
Step 5 — Ground the System

Every panel frame and rail section must be bonded to a common ground. Use WEEB (Washer, Electrical Equipment Bond) grounding clips between the panel frame and rail, or dedicated grounding lugs with bare copper wire run to your grounding electrode. This is a code requirement, not optional.
Step-by-Step: Mounting on Corrugated or R-Panel Roofs
The rail and panel steps are the same as above. The difference is how you attach to the roof surface.
- Locate purlins or rafters beneath the metal with a stud finder or by tapping/using a magnet to find screws.
- Pre-drill pilot holes through the raised ridges (never the valleys — water runs there). Use a 3/16″ bit for 5/16″ lag bolts.
- Apply butyl sealant tape to the underside of the bracket base before setting it down.
- Drive lag bolts through the bracket, through the metal panel, and into the purlin below. Torque to 8–10 ft-lbs — enough to compress the EPDM washer without crushing it.
- Attach rail to the brackets and proceed with panel installation as described above.
Each penetration point is a potential leak, so take your time here. The butyl tape + EPDM washer combination is the gold standard — it’s what metal building manufacturers use for their own fasteners.
Common Mistakes
1. Using silicone caulk instead of butyl tape for sealing penetrations. Silicone doesn’t bond well to Galvalume or painted metal long-term. Butyl tape stays flexible and maintains a seal through thermal cycling. Every experienced metal roof installer we’ve seen recommends butyl.
2. Ignoring wind load calculations. A 400-watt panel is roughly 21 sq ft of sail area. At 110 mph wind speed (common design requirement), that’s over 50 lbs of uplift per square foot. If your clamp spacing doesn’t account for your local wind zone, you’re risking a catastrophic failure. Check ASCE 7 wind maps or consult your local building department.
3. Mounting directly to the metal skin without hitting structure. On pole barns and metal buildings, the sheet metal alone has almost zero pullout strength. Lag bolts must engage purlins or rafters underneath — 1.5″ minimum thread engagement into solid wood or steel.
4. Skipping the electrical permit. Even off-grid systems in most counties require an electrical inspection for the DC wiring and grounding. Getting caught without a permit can mean removing the whole array.
Our Recommendations
Best Clamp for Standing Seam: S-5! S-5-N Mini Clamp
The industry standard for a reason. Rated for 2,500+ lbs of holding strength on most seam profiles, installs with one set screw, and carries a lifetime warranty. Compatible with all major rail systems via the S-5! PVKIT adapter.
Search on Amazon: S-5 N Mini Clamp
Best Rail System: IronRidge XR100
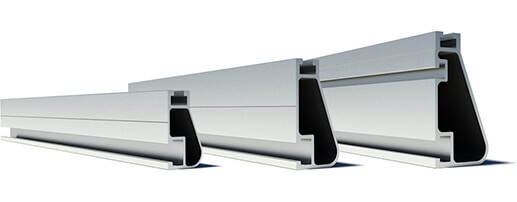
Lightweight, strong (spans up to 72″ between supports depending on load), and universally compatible with panel frames from 30–46mm thick. The XR100 is what most professional installers spec for residential jobs, and it’s well-documented with free span calculators on IronRidge’s website.
Search on Amazon: IronRidge XR100 Solar Rail
Best Bracket for Corrugated/R-Panel: S-5! CorruBracket 500T
Purpose-built for trapezoidal and corrugated profiles. The 500T version handles panels up to 500 watts and includes a built-in base that distributes load across the rib. Pair it with appropriate lag bolts and butyl tape for a clean, weather-tight install.
Search on Amazon: S-5 CorruBracket 500T
FAQ
Can I mount solar panels on a metal roof without drilling holes?
Yes — but only on standing seam roofs. Clamp-on systems like the S-5! line grip the raised seam mechanically with no penetrations. Corrugated and R-panel roofs always require lag bolt penetrations because there’s no raised seam to clamp onto.
How much weight can a metal roof support for solar panels?
Most residential metal panels over a standard rafter or truss system (24″ on center) can handle 3–5 lbs per square foot of added dead load. A typical solar panel weighs about 2.5 lbs/sq ft including mounting hardware, which is well within limits. Pole barn roofs with wider purlin spacing may need an engineering review.
Do I need to remove snow from solar panels on a metal roof?
Generally no. Metal roofs shed snow faster than asphalt, and panels mounted flush with a low profile (typical for clamp-on systems) tend to clear themselves. However, if you’re in a heavy snow zone (50+ psf ground snow load), make sure your mounting system and roof structure are rated for the combined load.
Will mounting solar panels void my metal roof warranty?
Non-penetrating clamp systems on standing seam roofs typically don’t void the warranty — most major manufacturers (Sheffield Metals, McElroy Metal, Fabral) explicitly permit S-5! type clamps. Penetrating mounts on corrugated or R-panel roofs are a gray area; check your warranty documentation or call the manufacturer before drilling.
How far apart should the mounting rails be spaced?
Rail spacing depends on your panel dimensions and orientation. For a standard 66-cell panel (approximately 45″ × 22″ frame) mounted in portrait, rails should be spaced so each rail lands about 25% inward from the panel’s short edges — typically around 40–44″ apart. Your panel manufacturer’s installation manual will list the exact recommended mounting hole locations.