Build a Reliable Spring Water System (Step-by-Step)
If you’ve got a spring on your property, you’re sitting on one of the most reliable off-grid water sources available — gravity-fed, naturally filtered, and free. But a raw seep in a hillside isn’t a water system. Without proper development, that spring can deliver silty, contaminated, or seasonally unreliable water that’s more frustrating than useful. We’ve dug into hydrogeology fundamentals, state extension service guides, and years of homesteader forum reports to put together a practical guide for turning a natural spring into a dependable, year-round water source.
What You’ll Learn
- How to identify, evaluate, and flow-test a spring before committing to development
- Step-by-step methods for building a spring box collection system
- How to run gravity-fed lines from spring to cabin and size your storage correctly
- Critical mistakes that contaminate or destroy spring flow — and how to avoid them
Understanding Your Spring Type
Before you touch anything, you need to know what kind of spring you’re working with. This determines your entire development approach.
Gravity Springs (Descending)
Off-Grid Insider
Get off-grid guides & gear picks in your inbox — free

These emerge where a water table intersects a hillside. Water flows downhill through permeable rock or soil until it hits an impermeable layer (clay, bedite, solid rock) and gets pushed to the surface. These are the most common and easiest to develop. You’ll typically see them as a wet patch or small trickle on a slope.
Artesian Springs (Ascending)

Water is under pressure from a confined aquifer and pushes upward through cracks or faults. These are less common but often deliver higher, more consistent flow rates. You’ll recognize them as water bubbling up from relatively flat ground, sometimes with visible sand movement.
Seeps vs. True Springs
A seep is a broad, diffuse wet area. A true spring has a defined emergence point. Seeps can be developed, but they require a French drain collection approach rather than a spring box. Don’t assume a seep is a spring — the development method is completely different.
Step 1: Evaluate and Flow-Test Your Spring
Never build infrastructure around a spring you haven’t measured across seasons. At minimum, you need flow data from the driest part of the year in your region.
How to Measure Flow Rate
Use a stopwatch and a container of known volume. A 5-gallon bucket works for modest springs. Direct all visible flow into the bucket and time how long it takes to fill.
- 5-gallon bucket fills in 60 seconds = 5 gallons per minute (GPM) — excellent for a household
- 5-gallon bucket fills in 5 minutes = 1 GPM — adequate for a small household with storage
- 5-gallon bucket fills in 20 minutes = 0.25 GPM — marginal, but workable with a large holding tank (1,000+ gallons)
A family of four typically needs 200–400 gallons per day. At 0.25 GPM, the spring produces about 360 gallons per day — enough if you have adequate storage to buffer demand spikes.
Water Quality Testing

Send a sample to a certified lab before you drink from it. Test for coliform bacteria, nitrates, pH, hardness, and heavy metals at minimum. Many county extension offices offer subsidized testing for $30–$75. Spring water is often cleaner than surface water, but livestock uphill, old mining activity, or septic systems can introduce serious contamination.
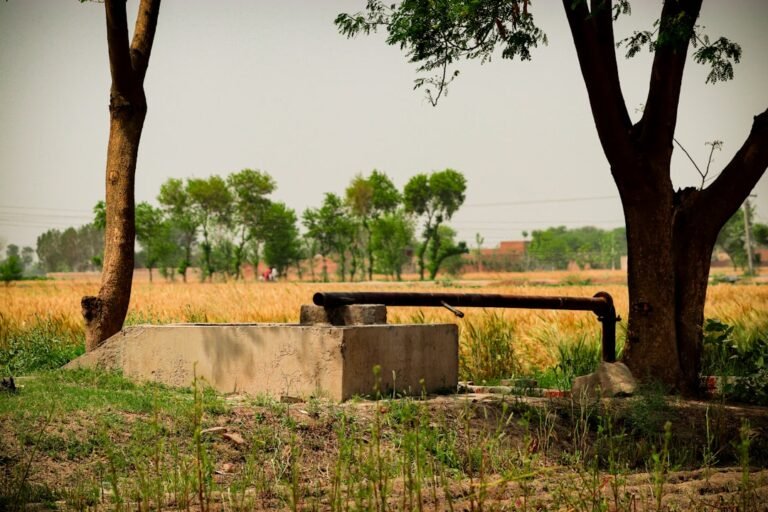
Step 2: Build a Spring Box

A spring box is the core of any developed spring. It’s a watertight enclosure placed directly over the spring’s emergence point that collects water while keeping out surface runoff, insects, and animals.
Materials

- Concrete spring box (pre-cast or poured in place) — most durable option
- Food-grade polyethylene tank with the bottom cut out — easier to install, works well for gravity springs
- Stone and mortar — traditional, functional, but labor-intensive
For most homesteaders, a concrete spring box in the 3×3×3-foot range is the sweet spot. Pre-cast concrete boxes designed for spring collection are available regionally, or you can form and pour one on-site using standard concrete mix.
Installation Process
-
Excavate carefully around the emergence point. Dig by hand. A backhoe will destroy the natural channels feeding the spring. Expose the point where water exits the ground and the impermeable layer beneath it.
-
Set the box over the emergence point. The bottom should be open or have a gravel bed so water can enter from below. Bed the box on 6–8 inches of washed gravel (¾-inch stone, no fines) to allow water to flow freely into the collection chamber.
-
Install an overflow pipe. This is non-negotiable. Use a 2-inch PVC pipe set 2–3 inches below the top of the box. Without it, back-pressure can force water to find new paths around your box and you’ll lose your spring.
-
Install the outlet pipe. A 1-inch or 1.25-inch polyethylene pipe, set a few inches above the gravel bed so sediment stays below the intake. Use a brass or stainless steel screen on the inlet end.
-
Seal the top. Use a concrete lid or heavy-duty cover that prevents surface water from entering. Slope the surrounding grade away from the box. Any surface water that enters your spring box is a contamination vector.
-
Backfill with clay. Pack impermeable clay around the outside of the box to divert surface runoff away from the collection area. This clay cap should extend at least 3 feet in every direction and slope downhill.
Protecting the Spring Area
Fence livestock out — a minimum 100-foot buffer uphill from the spring. Avoid any construction, fuel storage, or septic components uphill. Even foot traffic directly over a spring can introduce pathogens through the soil over time.
Step 3: Run Your Supply Line

Gravity is your best friend off-grid. If your spring is uphill from your cabin (the ideal scenario), you can deliver water with zero pumping cost.
Pipe Sizing and Head Pressure

Every foot of elevation drop between the spring and your point of use gives you roughly 0.433 PSI of pressure. For a comfortable household system:
- 50 feet of elevation drop = ~22 PSI (workable for basic fixtures)
- 100 feet of elevation drop = ~43 PSI (comfortable household pressure)
- 150+ feet of elevation drop = use a pressure-reducing valve to keep pressure under 60 PSI
Use 1-inch HDPE (high-density polyethylene) pipe rated for potable water. It’s flexible, UV-resistant, and handles freeze-thaw well. Bury lines below your local frost line — typically 18–48 inches depending on climate zone. In cold climates, insulating exposed sections and running a small continuous drip during deep freezes prevents ice blockages.
For runs over 500 feet, bump up to 1.25-inch pipe to reduce friction loss. You can calculate exact friction loss using the Hazen-Williams equation, but a good rule of thumb: for every 100 feet of 1-inch HDPE pipe at 2 GPM flow, expect about 2–3 PSI of friction loss.
When You Need a Pump
If your spring sits lower than your cabin, you’ll need to pump water up to a storage tank. A 12V DC pump powered by a small dedicated solar panel works well for this. The Shurflo 4008 series is a workhorse in the off-grid community — it self-primes, runs dry without damage, and delivers 3 GPM at up to 55 PSI. Pair it with a float switch in your holding tank so it runs automatically.
Step 4: Size Your Storage

Storage buffers the gap between spring flow and household demand. Even with a generous spring, you want a minimum of two days’ supply on hand.
- Family of 2 (conservative use): 500-gallon tank minimum
- Family of 4: 1,000–1,500-gallon tank
- Seasonal variability or low flow: 2,500+ gallons
Food-grade polyethylene tanks are the standard. Black or dark green tanks resist algae growth. Place your tank as high as feasible to maximize gravity pressure to your fixtures.
A 1,000-gallon poly storage tank runs $500–$900 depending on brand and region. ConeBottom tanks are easier to drain and clean but cost more.
Common Mistakes That Ruin Springs
Excavating too aggressively. The single most common mistake. Using heavy equipment near a spring emergence point can collapse the natural channels that feed it. Multiple homesteaders have reported permanently losing spring flow after backhoe work. Always hand-dig within 10 feet of the emergence.
Skipping the overflow. Without an overflow pipe, hydrostatic pressure builds up and water finds alternative paths. Within months, your spring box goes dry while water emerges 20 feet downhill in a new location.
Not testing water seasonally. A spring that tests clean in spring runoff might show coliform after summer thunderstorms. Test at least twice — once during high flow and once during dry season. Contamination patterns often follow weather events.
Burying pipe above the frost line. Frozen supply lines in January aren’t just inconvenient — the expansion can crack HDPE fittings and introduce contamination at joints. Know your frost depth. When in doubt, bury deeper.
Our Recommendations
Best all-around supply pump for spring-to-tank systems: The Shurflo 4008-101-A65 handles the demands of most off-grid spring systems at 3 GPM and 55 PSI max. It’s affordable (~$65–$80), widely available, and replacement parts are easy to find. Community feedback consistently rates it as reliable through multiple seasons.
Best pipe for spring supply lines: 1-inch HDPE potable water pipe, 160 PSI rated in 100-foot or 300-foot rolls. HDPE is the industry standard for buried water lines — flexible enough to follow terrain, tough enough to handle rocky backfill, and rated for decades of service.
Best inline sediment filter for spring systems: A dual-stage big blue filter housing with a 20-micron sediment cartridge followed by a 5-micron carbon block handles the typical sediment and taste issues that spring water carries. Install it after your storage tank and before your house plumbing. Budget roughly $15–$25 per year in replacement cartridges.
FAQ
Do I need a permit to develop a spring on my property?
It depends entirely on your state and county. Western states with prior-appropriation water law (Colorado, Montana, Idaho, etc.) often require water rights permits even for springs on your own land. Eastern states with riparian rights are generally more permissive. Check with your county planning office before breaking ground — retroactive permitting is expensive and sometimes impossible.
How do I keep my spring line from freezing in winter?
Bury pipe below the frost line for your area. For exposed sections near the spring box or entry to the building, use self-regulating heat tape wrapped with pipe insulation. Running a pencil-thin continuous flow through the line during extreme cold events also prevents freezing — the moving water resists ice formation.
Is spring water safe to drink without treatment?
Not automatically. Many springs deliver clean water that meets EPA standards, but you can’t know without lab testing. Even clean springs can show intermittent contamination after heavy rain. At minimum, use a sediment filter and a UV purifier downstream of your holding tank. A gravity-fed Berkey-style filter is a popular backup for drinking water.
What’s the minimum flow rate that’s worth developing?
Even 0.1 GPM (about 144 gallons per day) is worth developing if you have enough storage. That’s enough for a conservative single person or couple with a 1,500-gallon buffer tank. Below 0.1 GPM, you’re looking at supplementing with rainwater collection or a well.
Can a spring dry up permanently?
Yes, though it’s uncommon for well-established springs. Land use changes uphill (logging, development, drainage rerouting) can redirect the aquifer that feeds your spring. More commonly, springs reduce flow during drought years and recover when the water table rebounds. Monitoring flow rate annually gives you early warning of long-term decline.