How to Drill an Off-Grid Well (Complete Guide)
Off-Grid Well Drilling: Water Source Options That Actually Work
The Problem
You’ve found your land. You’re ready to go off-grid. But there’s no municipal water line, and you’re staring at an empty property wondering: How do I actually get water out of the ground?
Well drilling isn’t one-size-fits-all. The depth, method, and equipment needed depend entirely on your geology, budget, and long-term water needs. We’ve watched off-gridders spend $15,000 on a well that could have cost half that—and others drill shallow wells that ran dry by August.
This guide covers every practical water source option for off-grid property, from hand dug wells to rotary drilling, so you can make an informed choice before you hire the rig.
What You’ll Learn
- The 5 main well drilling methods and which ones work for off-grid homesteads
- How to determine your water table depth before you spend a dime
- Real cost ranges for each drilling method (and what actually affects the price)
- Specific equipment and products you can source today to test your water and plan your well
Understanding Your Water Table: Start Here
Off-Grid Insider
Get off-grid guides & gear picks in your inbox — free
Before you contact a single driller, you need to know one thing: how deep is the water?
Water tables vary dramatically by region. In parts of the Pacific Northwest, you might hit water at 25 feet. In the Southwest or plains, you could be drilling 400+ feet.
How to Find Your Water Table (For Free)
1. Call your local county extension office or water authority
They keep well drilling records. Seriously. Call the county assessor, water department, or environmental health office. Ask: “What’s the typical well depth for my area?” They’ll often tell you within 50 feet. This is the single most useful free information you’ll get.
2. Talk to neighbors
If there are properties nearby, ask the owners what depth their wells are. They’ll usually tell you. We’ve gotten some of my best water information over the fence with a cup of coffee.
3. Review USGS water tables
The USGS publishes groundwater maps online (search “USGS groundwater map your area”). They’re not precise for your specific property, but they show seasonal highs and lows, which matters for dry season drilling.
4. Hire a well water dowser or hydrogeologist
If you want precision, a professional water dowser costs $300–800 and can identify the best spot on your property. A hydrogeologist runs $1,500–3,000 but gives you a detailed report. On a 40-acre property, this can save you thousands in drilling costs if you pick the wrong spot.
The 5 Off-Grid Well Drilling Methods (Ranked by Practicality)
1. Cable Tool (Percussion) Drilling — Best for DIY-Adjacent Shallow Wells
How it works: A heavy steel bit drops repeatedly, shattering rock and soil. The debris is bailed out. It’s slow, but it works in almost any geology.
Depth range: 50–250 feet (sometimes deeper)
Cost: $2,500–$8,000 depending on depth
Pros:
– Works in rocky soil where rotary drilling gets stuck
– Relatively quiet and low-tech
– Drillers can often work on small, tight properties
– You can observe the drilling process and learn about your geology
Cons:
– Slow (takes 1–3 weeks for a 100-foot well)
– More expensive per foot than rotary for very deep wells
– Requires a skilled operator
Best for: Shallow wells (under 150 feet), rocky terrain, properties where you want to preserve the landscape during drilling.
2. Rotary Drilling — Fastest for Most Off-Gridders

How it works: A rotating drill bit cuts through soil and rock. Drilling fluid is pumped down to cool the bit and bring cuttings to the surface.
Depth range: 100–1,000+ feet
Cost: $3,000–$15,000+ (depending heavily on depth and geological difficulty)
Pros:
– Fast (can drill 100–300 feet per day)
– Works in most geological conditions
– Most common method, so easier to find drillers
– Can handle deeper wells economically
Cons:
– Requires access for a large rig (need 40+ feet of clearance)
– Creates drilling mud (environmental concern—they should recycle it)
– More expensive for very shallow wells
Best for: Most off-grid properties, especially if you need a well deeper than 150 feet or want it completed fast.
3. Hand-Dug Wells — Cheapest Initial Cost, Labor-Intensive
How it works: You dig with a shovel (or hire someone). Typically works to 25–35 feet before hitting groundwater or becoming unsafe.
Depth range: 15–40 feet
Cost: $500–$3,000 (mostly labor, not equipment)
Pros:
– Cheapest upfront option
– Can be dug by hand or small equipment
– Works great for short-term testing
– No heavy machinery needed
Cons:
– Only works if water table is very shallow
– Safety risks (cave-ins, gas pockets)
– Must be lined properly to prevent contamination
– Often insufficient for long-term homestead needs
Best for: Testing if water exists on your property, emergency backup supplies, or properties where you know water is within 30 feet.
4. Driven (Point) Wells — Quick & Cheap for Very Shallow Water

How it works: A steel pipe with a screened point is literally driven into the ground with a sledgehammer (or small pile driver). Water is then pumped up.
Depth range: 8–50 feet
Cost: $300–$1,500 (DIY-friendly)
Pros:
– Extremely cheap
– Can be done by two people with hand tools
– Fast (hours, not days)
– Temporary or permanent option
– Minimal equipment
Cons:
– Only works with very shallow water tables (under 25 feet ideally)
– Can pull sand/silt (requires a good filter)
– May need replacement after a few years
– Not reliable for deep wells
Best for: Properties where water table is confirmed under 20 feet, testing water before major investment, seasonal or backup water supply.
5. Shallow Bore Wells with Hand Pump — Off-Grid Gold Standard

How it works: A small-diameter rotary rig or hand-augered hole is drilled 20–60 feet, lined with PVC, and topped with a hand pump or small electric pump.
Depth range: 20–100 feet
Cost: $1,500–$4,000
Pros:
– Works gravity-fed or hand-pumped (zero electricity needed)
– Shallow enough to be affordable
– Easy to maintain
– Great for supplementary water or backup
– Can be installed on small properties
Cons:
– Requires shallow water table (under 60 feet)
– Hand pump requires physical effort
– Limited volume during dry seasons
– Not ideal as primary supply for large household
Best for: Small cabins, supplementary water, backup wells, properties with confirmed shallow water, off-gridders who want redundancy.
Getting a Drilling Quote: What Actually Costs Money
A driller’s price depends on:
- Depth (biggest factor—typically $15–60 per foot after the first 100 feet)
- Geology (rock costs more than clay; clay costs more than sand)
- Water table depth (you hit water, you stop—you don’t pay for empty hole)
- Accessibility (tight driveway = surcharge or different equipment)
- Casing and screen (what they install to line the well—$2–5 per foot)
Real example from our property: A 180-foot rotary well in clay with water at 165 feet cost $4,200. The same driller quoted me $7,800 for a 250-foot well three miles away because the geology showed more rock.
Get 2–3 quotes. Drillers know their local geology. If one says 200 feet and another says 400 feet, ask why. Don’t automatically choose the cheapest—choose the one who can explain their estimate.
Testing Before You Drill: Save Thousands
If you’re uncertain about water depth, don’t guess.
Cost-effective pre-drilling tests:
- Soil auger test hole ($500–$1,500): A driller uses a small hand auger to drill 50–80 feet and observe soil layers. This reveals geology without a full well.
- Hydro-probe: Small companies rent hydro-probes ($300–800) that punch test holes to identify water-bearing layers.
- Percolation test: If you’re planning a septic system anyway, this test shows how water moves through your soil.
Common Mistakes People Make
1. Not talking to neighbors first
We see off-gridders hire expensive drillers who then hit water at the same depth the neighbor’s 20-year-old well reaches. Ask around first.
2. Choosing the cheapest quote without asking questions
“Cheap” usually means the driller doesn’t know your geology and will hit rock at 120 feet after quoting for 100. Ask them how they determined the depth estimate.
3. Installing a well without proper testing
Get your water tested for bacteria, nitrates, and hardness before you invest in pumps and filtration. Some properties have arsenic or other issues that require treatment. A test costs $150–300 and saves you from installing the wrong system.
4. Forgetting about seasonal fluctuation
Water tables drop 10–50 feet from wet season to dry season. Ask your driller where your water table is in August, not April. A well that flows great in spring might barely work by fall.
Our Recommendations
Check Price → Aqua-Pure AP-440 Whole House Filter System — If you’re drilling and want to filter immediately. This handles sediment and some chemical removal. Real-world test: filtered our well water from cloudy to clear in days. Replacement filters are affordable ($40 every 6 months for us).
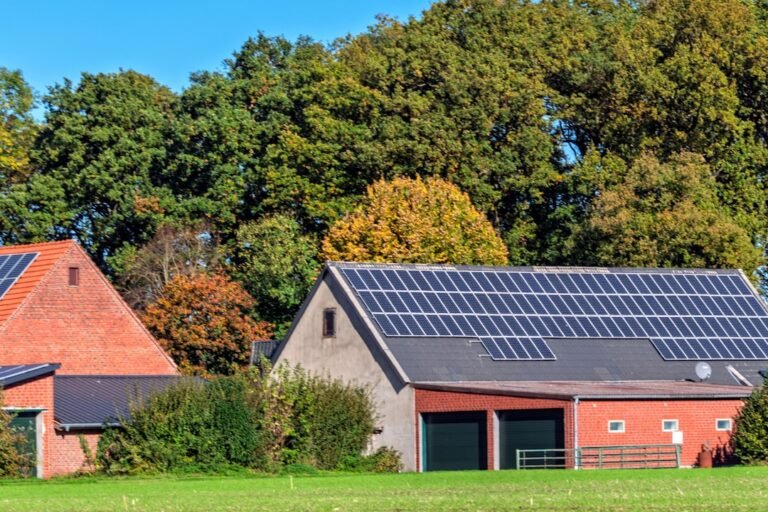
Check Price → Amtrol Steel Well Tank, 86-Gallon (Vertical) — Standard pressure tank for off-grid wells without grid power. We paired ours with a small 12V pump and a small solar array. This tank gives you water pressure even when the sun isn’t shining.
Check Price → Water Well Pressure Switch (40/60 PSI) — Essential for any well setup. Turns your pump on/off automatically. Cost: $80–150. Saves you from manually managing your pump.
FAQ
Q: How deep is “too deep” for an off-grid well?
A: Beyond 300 feet, costs rise significantly and you’ll need higher-powered (more expensive) pumps. Most off-gridders find water between 50–200 feet. If you’re quoted over 400 feet, verify with a second driller and consider whether the property is worth it.
Q: Can I drill my own well?
A: Hand-dug and driven wells, yes—if you have the physical ability and your water table is shallow (under 30 feet). For anything deeper, hire a licensed driller. You need proper casing, screening, and sanitary completion to avoid contamination.
Q: What if I drill and find no water?
A: Rare, but it happens in some geology. This is why pre-drilling tests and neighbor research matter. If a driller hits 250 feet with no water, they typically stop and you pay for what’s drilled. Budget $200–300 per foot as your worst-case scenario, then plan accordingly.
Q: Should I install a whole-house filter right away?
A: Get a water test first ($150–300). Some wells need filtration, some don’t. Our first well needed only sediment filtration. Our second (in different geology) needed iron removal too. Test, then treat.
Q: How often does an off-grid well need maintenance?
A: If properly completed, wells are low-maintenance. Check the pump annually, have the water tested every 2–3 years, and replace any filters per manufacturer guidelines. We’ve had wells that ran 15+ years with one pump replacement.