Save 1000+ Gallons/Year: DIY Rainwater Harvesting
How to Set Up a Rainwater Harvesting System for Off-Grid Living: A Hiker’s Complete Guide
The Problem: Water Independence on the Trail and Beyond
When you’re hiking remote terrain or planning an off-grid cabin, reliable water sourcing becomes non-negotiable. You can’t summit mountains on dehydration, and you definitely can’t live off-grid without a solid water strategy. If you’ve ever carried a heavy water bladder on a multi-day trek or worried about your off-grid water supply during a dry season, you know exactly why rainwater harvesting matters.
A proper rainwater collection system gives you independence, redundancy, and peace of mind—whether you’re setting up a seasonal hiking basecamp or a full-time off-grid home. This isn’t about complicated engineering. It’s about practical, tested systems that work.
What You’ll Learn in This Guide
- Exactly how to size and install a DIY rainwater tank system for your climate and water needs
- The real capacity calculations you need (not generic advice about “collecting runoff”)
- How to design a water storage setup that handles seasonal variation and keeps water clean
- Specific product recommendations and setup costs so you can actually start today
Part 1: Calculate Your Water Needs and System Size
Off-Grid Insider
Get off-grid guides & gear picks in your inbox — free
How Much Water Do You Actually Need?
This isn’t a guess-and-hope situation. Let’s do the math.
Daily water requirements:
– Drinking and cooking: 0.5–1 gallon per person per day
– Hygiene (washing hands, face, basic shower): 2–3 gallons per person per day
– Off-grid laundry and dishes: 5–10 gallons per person per day
– Total for one person: 7.5–14 gallons per day
For a household of two people planning off-grid living, budget 15–28 gallons daily. For seasonal hiking camps where you’re supplementing with bottled water, 10–20 gallons might suffice.
Calculate Your Collection Capacity
Here’s the real metric: how much rain your roof actually collects.
The formula:
– Roof area (square feet) × rainfall amount (inches) × 0.623 = gallons collected
Example: If your roof catchment area is 500 square feet and you receive 30 inches of annual rainfall:
– 500 × 30 × 0.623 = 9,345 gallons per year
– Divided by 365 days = 25.6 gallons per day average
But here’s what beginners miss: rainfall is seasonal. If you live in a dry region with 15 inches annually but 60% falls in 3 months, your system needs larger storage capacity to bridge dry months.
Check your local annual rainfall data at weather.gov (US) or your regional meteorological service. This number drives everything else.
Tank Size Recommendations

Based on 15–28 gallons daily use and seasonal variation:
| Living Situation | Recommended Tank Size | Seasonal Storage Need |
|---|---|---|
| Seasonal hiking camp (3–4 months) | 500–1,000 gallons | Backup for dry spells |
| Off-grid home (year-round, 1–2 people) | 2,500–5,000 gallons | 90–180 day dry season capacity |
| Off-grid home (3+ people) | 5,000–10,000 gallons | Full dry season independence |
For off-grid homes in low-rainfall areas, 10,000 gallons minimum is realistic.
Part 2: Choose and Install Your Collection System

Select Your Catchment Surface
Roof materials matter. Metal roofs (standing seam or corrugated) are ideal—they’re clean, durable, and shed water efficiently. Asphalt shingles work but shed more debris and mineral particles. Avoid tar-paper roofs and heavily treated wood.
Calculate your actual catchment area: Measure roof length × width in the direction rain flows. If your roof is 30 feet long and 20 feet wide, that’s 600 square feet of potential collection surface—though you’ll realistically use 80–90% of it (accounting for gutters and overhang angles).
Install Gutters and Downspouts

Use 5-inch seamless aluminum gutters (the standard for rainwater systems). Avoid vinyl gutters in harsh climates—they become brittle and crack.
Installation specifics:
– Slope gutters at minimum 1/8 inch drop per 10 linear feet (toward downspouts)
– Install leaf screens or gutter guards rated for fine debris (not just leaves)
– Use 3–4 inch diameter downspouts, positioned to direct water to your tank
Product recommendation: Check Price → Amerimax 5-inch K-Style Aluminum Gutter System ($0.80–$1.20 per linear foot) with Gutterglove Pro gutter guards ($1.50 per linear foot). Together, roughly $150–$250 for an average cabin setup.
Install a First-Flush Diverter

This is the gear you’re probably skipping—and it’s critical.
The first 20–40 gallons of rain washoff your roof contain dust, bird droppings, debris, and roof particles. A first-flush diverter automatically diverts this dirty initial runoff away from your tank, then directs clean water to storage.
How it works:
A simple PVC pipe assembly (4-inch diameter) with a ball valve sits between your downspout and tank. As water fills the pipe, a float ball rises, tripping a lever that closes the valve. After rain stops, the pipe drains automatically, resetting for the next event.
DIY option: Build one for $30–$50 using PVC pipe, a float ball, and a ball valve. Check Price → RainHandler First Flush Diverter Kit ($79–$99) is pre-assembled and foolproof for off-grid homes where system reliability matters.
Part 3: Set Up Water Storage and Tank Installation
Choose Your Tank
For off-grid homes, you’ll need a multi-tank approach or one large system. Here’s what works:
Above-ground tanks (1,000–5,000 gallons):
– Advantages: Easy to install, replace, and inspect
– Best for: Systems you’ll maintain actively
– Products: Check Price → Snyder Industries 4,000-gallon polyethylene tank (~$900–$1,200) or IBC tote tanks (275–330 gallons, $50–$150 used, stackable for larger capacity)
Below-ground cisterns (5,000–10,000+ gallons):
– Advantages: Space-saving, temperature-stable, protected from freeze-thaw cycles
– Best for: Year-round off-grid living in cold climates
– Installation cost: $2,000–$5,000 (excavation + concrete prep + tank)
– Products: Reinforced concrete cisterns from local suppliers, or pre-fabricated fiberglass tanks
For hiking basecamp or seasonal use: Stack two 1,000-gallon tanks or use 5–6 IBC totes (total 1,500–2,000 gallons). This gives you redundancy and flexibility.
Tank Placement and Foundation
Critical installation steps:
-
Build a level concrete pad (4–6 inches thick, 1.5× the tank footprint). Pour it yourself or hire local concrete work (~$200–$400 for a small pad).
-
Ensure proper drainage around and under the tank to prevent standing water and mosquito breeding.
-
Position tanks near your main water use point (kitchen, bathroom) to minimize pumping distance. Every 50 additional feet of piping requires a slightly more powerful pump.
-
Keep tanks in shade or insulated in extreme climates. Direct sun promotes algae growth; freezing temperatures can crack tanks. Paint light-colored tanks or construct a simple wooden frame with shade cloth.
-
Install overflow pipes sized to handle your maximum rainfall intensity. For heavy storms, overflow should direct water away from foundations (into a greywater garden, not back toward the house).
Connect Plumbing: Tank to House
You’ll need:
- Intake fitting (1–2 inch, screened)
- Outlet fitting near tank bottom (1–1.5 inch, with a sediment valve for flushing)
- Overflow outlet (same size as inlet, sloped away)
- Pressure tank or pump (see next section)
- Water distribution lines (1-inch PEX or PVC, insulated if in cold climate)
Typical layout: Collection → First-flush diverter → Tank intake → Pressure pump → Distribution → Filtration → House supply
Part 4: Filtration, Pumping, and Water Quality

Filtration System

Rainwater from a clean roof still needs filtering before use.
Multi-stage setup (most reliable for off-grid homes):
- Sediment filter (20-micron, removes particles)
- Activated carbon filter (removes tastes, odors, some chemicals)
- UV sterilization or fine mesh filter (optional, highly recommended for off-grid potable water)
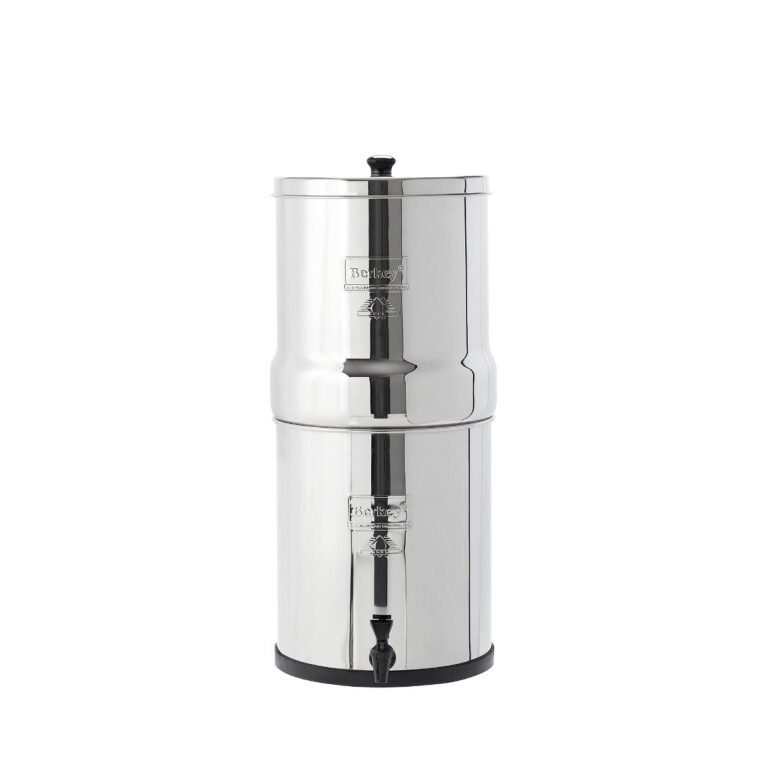
Real system cost: $200–$500 for a complete filter tower. Check Price → Berkey Water Filter Systems ($200–$400) are overkill for rainwater but work excellently for backup filtration on off-grid properties.
For seasonal camps, a simpler 20-micron filter ($50–$100) is adequate if you’re supplementing with bottled drinking water.
Pumping and Pressure

You’ll need pressure to run indoor fixtures (showers, faucets).
Options:
- Pressure tank + electric pump: 24V or 110V pump pressurizes a tank to 40–60 psi. Cost: $300–$600. Requires batteries or generator for off-grid homes.
- Solar pump system: 12V/24V solar-powered pump, silent and independent. Cost: $400–$800.
- Gravity feed (if elevation works): Position tank on a hill or raised platform. Provides 1 psi per 2.3 feet of elevation. Most off-grid homes can’t use pure gravity unless terrain cooperates.
For off-grid homes, We recommend a hybrid: Solar pump as primary with a backup electric pump powered by your battery bank. This eliminates generator fuel while providing redundancy.
Part 5: Winterization and Seasonal Maintenance

Cold Climate Protection
If temperatures drop below freezing:
- Insulate all exposed pipes with foam wrap or heated cable
- Install drain valves at all low points so water doesn’t freeze in lines
- Keep tank above freezing with a small heater (300W submersible tank heater, ~$50) connected to your power system
- Ensure overflow doesn’t freeze to tank (position away from prevailing winds)
For seasonal camps where the system sits dormant in winter, drain completely and flush tanks before shutting down.
Monthly and Seasonal Checks
- Check for debris in gutters and screens monthly
- Inspect tank for cracks or leaks quarterly
- Test water quality (turbidity, pH, taste) before drinking season
- Flush sediment from tank bottom once yearly (close intake valve, open sediment outlet valve, drain 50 gallons)
Common Mistakes People Make (And How to Avoid Them)

1. Undersizing Storage Capacity
The mistake: Installing a 1,000-gallon tank for year-round off-grid living because “it seems big.”
Reality: One person uses 7.5–14 gallons daily. One 1,000-gallon tank = 70–130 days of water. Miss 2–3 dry months, and you run dry.
Fix: Calculate your local dry season length. If you have 90 rainless days, you need 90 × 14 gallons = 1,260 gallons minimum for one person. Double that for safety and unexpected demand.
2. Collecting from Dirty Surfaces
The mistake: Running gutters from a roof covered in moss, lichen, or tar-bearing shingles directly into storage.
Reality: You’re collecting contaminated water that clogs filters and tastes terrible.
Fix: Clean your roof before rain season, use metal roofing ideally, and always install a first-flush diverter. Don’t skip this.
3. Ignoring Overflow and Mosquitoes

The mistake: Tank overflows directly onto the ground near the foundation. Summer heat = algae breeding ground = mosquitoes.
Fix: Slope overflow toward a greywater garden (for landscaping use) or away from living areas. Add a fine mesh screen to all tank openings (including overflow). Store tanks in shade.
4. Forgetting About Tank Sediment

The mistake: Never draining the sediment that accumulates at tank bottom.
Reality: After 2 years, you’ve got 4–6 inches of silt reducing storage capacity and degrading water quality.
Fix: Install a sediment valve at the lowest tank point. Drain 20–30 gallons every spring, more frequently in dusty climates.
Our Top Product Recommendations for Rainwater Harvesting
Check Price → Snyder Industries 4,000-Gallon Polyethylene Tank — $950–$1,200
Durable, UV-resistant, and built for off-grid living. Works as primary storage or pairs well with multiple smaller tanks. Food-grade plastic rated for potable water with proper filtration.
Check Price → RainHandler First Flush Diverter Kit — $79–$99
Pre-assembled and maintenance-free. Handles up to 5,000 square feet of roof area. This single component prevents 80% of water quality problems.
Check Price → Renogy 400W Solar Panel Kit with 40A Controller — $400–$500

Pairs perfectly with a 24V solar pump system. Gives your rainwater system true independence from the grid. Overkill for seasonal camps, essential for year-round homes.
FAQ: Rainwater Harvesting for Off-Grid Living
How much does a complete rainwater system cost?
For off-grid homes:
– Basic system (2,500-gallon storage, simple filtration, pump): $1,500–$2,500
– Mid-range system (5,000 gallons, multi-stage filtration, solar pump): $3,000–$5,000
– Premium system (10,000+ gallons, redundant pumping, backup power): $6,000–$12,000
Seasonal camps cost 40–50% less since you skip winterization and can use smaller tanks.
Is rainwater safe to drink without treatment?
No. Even from a clean roof, rainwater contains particles, bacteria, and potentially harmful substances (bird droppings, airborne dust). You need filtering at minimum, UV sterilization recommended. For off-grid potable use, test your water annually through a lab.
What if I don’t have a suitable roof?
You can collect from cleared ground using tarps or concrete pads, but this is less efficient. Roof collection is 5–10× more effective and cleaner. If your structure doesn’t work, consider a larger tarped collection area or supplementing with well water if available.
How do I winterize my system?
Drain all lines, insulate exposed pipes with foam wrap, add a tank heater if you’re maintaining pressure through winter, and close all intake valves. If the system sits dormant, drain completely to prevent freeze damage.
Can I use my rainwater for laundry and dishes without filtration?
Technically yes, but particles will clog washing machines over time. A single 20-micron sediment filter ($50–$100) prevents equipment damage and improves results. We’d call it essential, not optional.
Final Thoughts: Build It Yourself
Rainwater harvesting isn’t mysterious or overcomplicated. It’s a straightforward system that works because water always flows downhill and gravity always wins. We’ve installed variations of this setup at three different properties, and every one delivers water independence.
Start with realistic calculations of your actual water needs. Size your storage to cover your dry season. Install gutters, add a first-flush diverter, and filter properly. Everything else—pump selection, tank placement, winterization—follows logically from those foundations.
Your off-grid water system will be more reliable than you expect. And on a long summit day when you’re carrying one less water bottle because you know clean water waits at basecamp? That’s worth every dollar and hour invested.